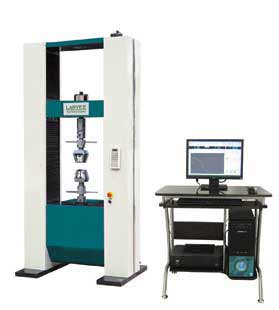
UE34XX series Tensile Testing Machine
Applications:
This electronic universal testing machine consist of host machine, mechanical limit switch, electrical system,test accessaries, etc . It is suitable for tensile, compression, bending and other mechanical property for metal and non-metal material, such as steel, aluminum,copper,geotextile,plastic,rubber,thread,wood,alloy,PVC,spring,electrical wire and cable,composite material,profiled bar, waterproof roll and all ASTM, ISO, JIS, DIN, BS, EN relative material mechanical testing standards.The machine is calibrated according to international norms requirement as ASTM E4, ASTM E83, ISO7500-1, ISO9513 and supply a full detailed calibration certificate.They are essential testing instruments for quality control section, university and college,research institution and mining enterprise quality lab.
Control System:
※ High accuracy Load cell, Encoder and optional extensometer to test the force,displacement and extension. Reading
resolution can be 1/300000 of full range. Computer 3 close-loop control testing mode of load, displacement and
extension.
※ Large Extension and Digital gauge input channel for special test of deformation.
※ Speed control from 0.01 to 500mm/min (special 1000mm/min) by servo motor.
※ PCI computer control card to get the test value and control the servo motor
※ Multi-languages supported, Data saves and transports to Microsoft Words, Excel.
※ Database function, allow customer define test method, real-time test point value, value result formula and test report
format.
※ Multi sensor supported. Max 4 load cell , 4 strain gauge extensometer, 1 large deformation extensometer and 1 digital
gauge can be defined.
※ Metric and British unit exchanging supported mm, N, KN, kg and inches, lbs and pound.
※ Calibration automatically and easily
※ Two grade of user administrate system for common operator and system administrator
※ Remote controller adjusts the machine crosshead before test and operate the test conveniently.
※ Support different version of Microsoft windows OS of WinXP, Vista, Windows 7 and etc.
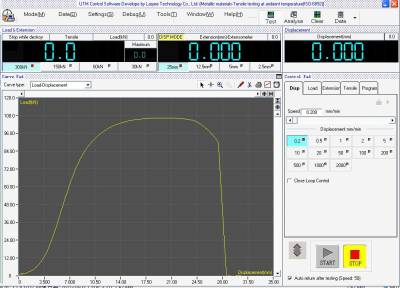
Software 1
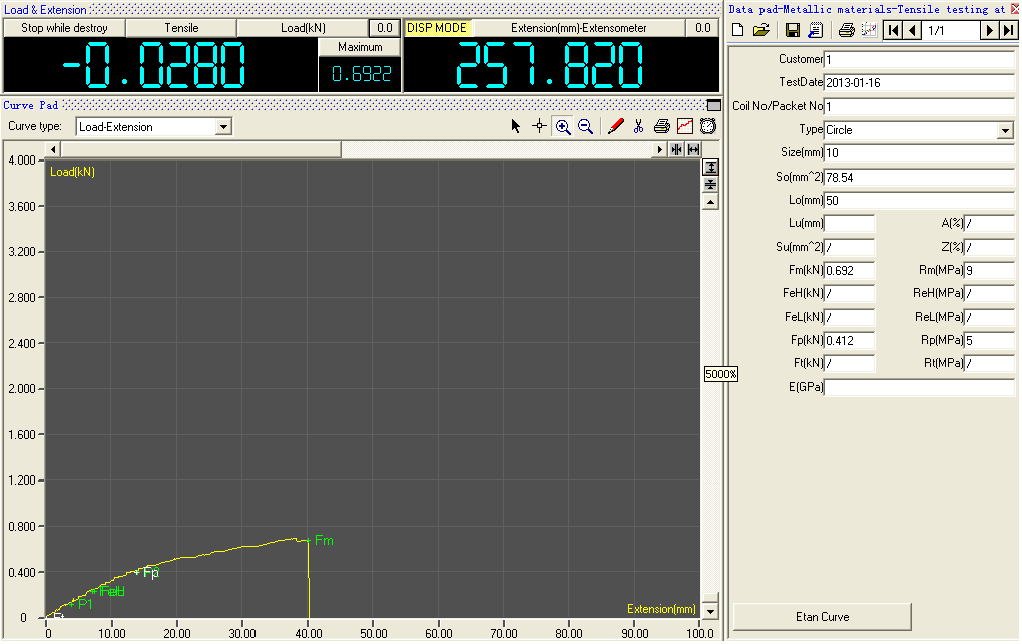
Software2
This electronic universal testing machine consist of host machine, mechanical limit switch, electrical system,test accessaries, etc . It is suitable for tensile, compression, bending and other mechanical property for metal and non-metal material, such as steel, aluminum,copper,geotextile,plastic,rubber,thread,wood,alloy,PVC,spring,electrical wire and cable,composite material,profiled bar, waterproof roll and all ASTM, ISO, JIS, DIN, BS, EN relative material mechanical testing standards.The machine is calibrated according to international norms requirement as ASTM E4, ASTM E83, ISO7500-1, ISO9513 and supply a full detailed calibration certificate.They are essential testing instruments for quality control section, university and college,research institution and mining enterprise quality lab.
Control System:
※ High accuracy Load cell, Encoder and optional extensometer to test the force,displacement and extension. Reading
resolution can be 1/300000 of full range. Computer 3 close-loop control testing mode of load, displacement and
extension.
※ Large Extension and Digital gauge input channel for special test of deformation.
※ Speed control from 0.01 to 500mm/min (special 1000mm/min) by servo motor.
※ PCI computer control card to get the test value and control the servo motor
※ Multi-languages supported, Data saves and transports to Microsoft Words, Excel.
※ Database function, allow customer define test method, real-time test point value, value result formula and test report
format.
※ Multi sensor supported. Max 4 load cell , 4 strain gauge extensometer, 1 large deformation extensometer and 1 digital
gauge can be defined.
※ Metric and British unit exchanging supported mm, N, KN, kg and inches, lbs and pound.
※ Calibration automatically and easily
※ Two grade of user administrate system for common operator and system administrator
※ Remote controller adjusts the machine crosshead before test and operate the test conveniently.
※ Support different version of Microsoft windows OS of WinXP, Vista, Windows 7 and etc.

Software 1

Software2
※Single testing space and high rigidity structure,linear stroke make sure crossbeam accurate alignment, adopts the most advanced and reliable floor type structure;
※Equipped with mechanical limited switch, emergency stop switch,can protect accessaries and sensors;
※Driver system adopt high precision ball screw,transmission smoothly,improve the transmission efficiency and accuracy of displacement;
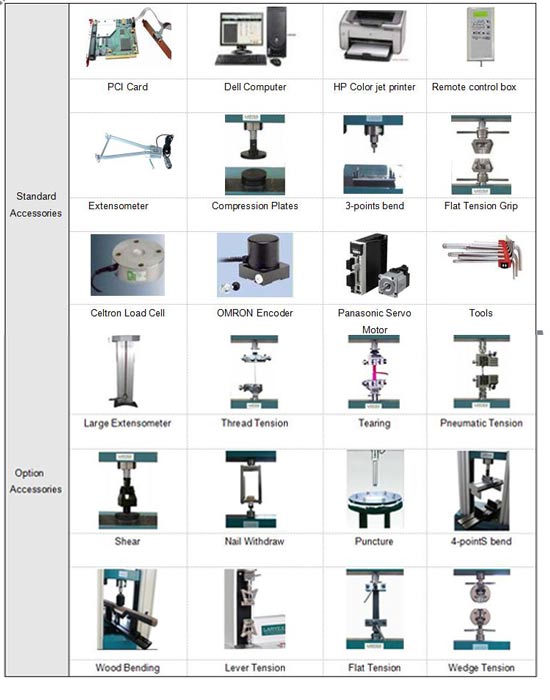
※Adopt PANASONIC servo motor drive,speed control of high precision,low noise;
※Adopt OMRON photoelectric encoder,small volum,high precision, reliable work;
※Adopt Celtron load cell to test the force,high resolutions;
※Speed control from 0.01 to 500mm/min (special 1000 mm/min) by servo motor;
※Large Extension and Digital gauge input channel for special test of deformation;
※Test process, result display, result analysis, result print, all the function can be controlled by the computer,testing data and curve can real-time display during test;
※Computer 3 close-loop control testing mode of load, deformation displacement;
※Various testing curves, Load-Time, Extension-Time, Stress-Strain, Load- Extension,ete. Can zoom and analysis at any point in the curve;
※Automatically calculate tensile strength, yield strength, modulus of elasticity, Rp0.2, Rt0.5;
※Support to change Excel format report, easy to pinpoint the location of the data;
※The same group sample can continuous testing, and can be analyzed separately for each test results;
※Can store testing result, testing curve and data;
※Have “Stop while destroy” function,system can automatic stop working when specimen is broken ;
※Remote controller adjusts the machine crosshead before test and operate the test conveniently;
※Support different version of Microsoft windows OS of WinXP,Vista,Windows 7 and etc.
| Model | UE3450 | UE34100 | UE34200 | UE34300 | |
| Maximum force(KN) | 50 | 100 | 200 | 300 | |
| Machine type | Floor | Floor | Floor | Floor | |
| Accuracy | ≤±0.5% | ||||
| Measuring range of force (KN) | 0.4%--100%F.S | ||||
| Resolution of force | 1/300000 of maximum force | ||||
| Accuracy of displacement measuring | ±0.5% | ||||
| Resolution of displacement | 0.1 μm | ||||
| Accuracy of deformation measuring | ±0.5% | ||||
| Speed range of displacement control | 0.01-500mm/min (Max 1000mm/min as special order) | ||||
| Speed range of force control | 0.005-5% F.S / S | ||||
| Speed range of deformation control | 0.005-5% F.S/S | ||||
| Range of constant displacement, force and deformation | 0.5%-100% F.S | ||||
| Speed controlling accuracy | ≦±1.0% of the set value | ||||
| Valid tension testing space(mm) | 650 | 650 | 600 | 600 | |
| Compression testing space(mm) | 900 | 900 | 1000 | 1000 | |
| Valid width between columns(mm) | 600 | 600 | 580 | 600 | |
| Tension Sample Clamping (mm) | Flat grips | 0~14 | 0~14 | 0~20 | 0~20 |
| Round grips | Ø4~22 | Ø4~22 | Ø9~26 | Ø9~26 | |
| Power supply | 3P~380V/220V, 4-7.5 kW, 50/60Hz | ||||
| Working environment | Room temperature 10℃~40℃, relative humidity≤90% | ||||
| Over Dimension without PC table (mm) | 1050×800×2250 | 1050×800×2250 | 1150×870×2450 | 1250×900×2650 | |
| Weight(Kg) | 1500kg | 1500kg | 1800kg | 2000kg | |
Loading...


